
chaosman12
Tele-Meister
A friend was cleaning out a relatives shed and found this FG-200. It was still in its case, but the case was was falling apart. He was wondering if the guitar could be made playable again. Here's some pics and questions I have about bringing it back to life.
Considering it may have been in the shed for 10 or more years, the body is in decent condition:

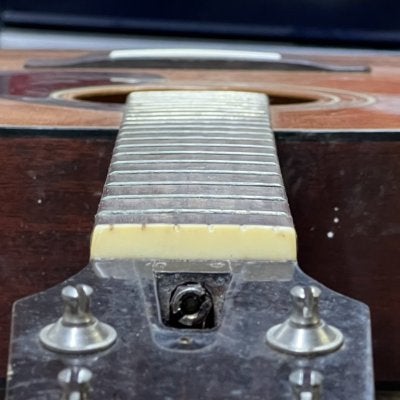
Fretboard wood looks pretty tired. Frets have light corrosion:

These flat spots looks like someone leveled the bass side of the frets, and didn't bother with crowning them.

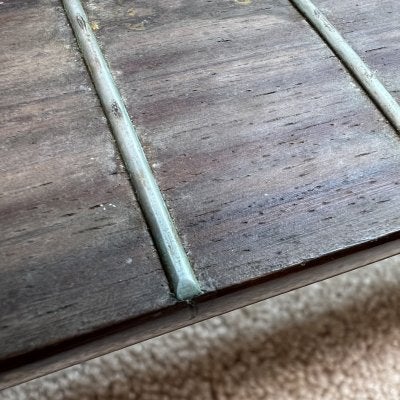
Is this amount of curvature normal? Or is it a sign of bellying?

Tuners have a lot of slop with the knobs and posts, but they seem to operate. Tag says Made in Taiwan.

I dribbled some penetrant (PB Blaster) onto the truss rod nut and the next day was able to loosen the truss rod nut.

Now the neck geometry:
With the truss rod loosened and a straight edge between the 1st and 12th fret, there is 0.007" of relief measured at the 6th fret.
With a straight edge between the 1st and 20 th (last) fret, the relief is 0.016" at the 12th and 13th frets. This confirms what looks like a rise of the fretboard over the body when viewing down the neck from the head stock.
The fret plane projection to the bridge should be level with the top of the bridge. Here, it is below by about 1/8". Is this too far from ideal that reasonable string height can't be achieved?

Saddle is about 3/32" above wood.

My main question is about adjusting the truss rod nut. Being that the guitar is about 50 years old (based in the SN) what are the risks of cranking down on the truss rod nut and what can I do to minimize the risks. The last thing I want to do is damage the truss rod.
Any other suggestions, advise or things that I should or shouldn't do? Thanks all.
Considering it may have been in the shed for 10 or more years, the body is in decent condition:
Fretboard wood looks pretty tired. Frets have light corrosion:
These flat spots looks like someone leveled the bass side of the frets, and didn't bother with crowning them.
Is this amount of curvature normal? Or is it a sign of bellying?
Tuners have a lot of slop with the knobs and posts, but they seem to operate. Tag says Made in Taiwan.
I dribbled some penetrant (PB Blaster) onto the truss rod nut and the next day was able to loosen the truss rod nut.
Now the neck geometry:
With the truss rod loosened and a straight edge between the 1st and 12th fret, there is 0.007" of relief measured at the 6th fret.
With a straight edge between the 1st and 20 th (last) fret, the relief is 0.016" at the 12th and 13th frets. This confirms what looks like a rise of the fretboard over the body when viewing down the neck from the head stock.
The fret plane projection to the bridge should be level with the top of the bridge. Here, it is below by about 1/8". Is this too far from ideal that reasonable string height can't be achieved?
Saddle is about 3/32" above wood.
My main question is about adjusting the truss rod nut. Being that the guitar is about 50 years old (based in the SN) what are the risks of cranking down on the truss rod nut and what can I do to minimize the risks. The last thing I want to do is damage the truss rod.
Any other suggestions, advise or things that I should or shouldn't do? Thanks all.
Attachments
Last edited:


