Removing Poly finish from maple fret board?

  • Thread starter tacomamc
  • Start date
  • This site may earn a commission from merchant affiliate links like Ebay, Amazon, and others.

tacomamc

Tele-Afflicted
Joined
Jul 2, 2009
Posts
1,973
Location
Northeast Pa
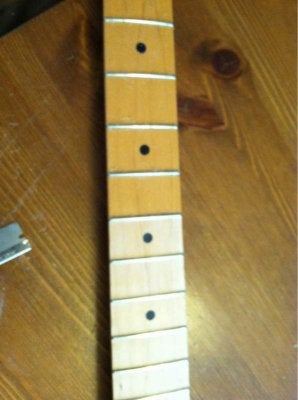
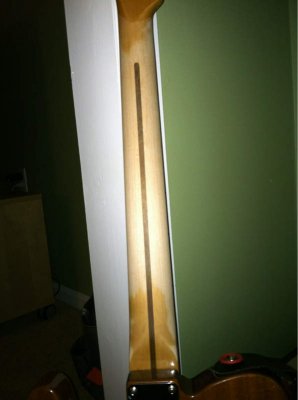
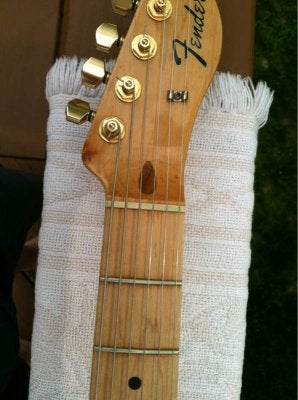
I’ve got a 2006 MIM Classic Series ’69 Thinline. I like the neck profile, the vintage radius, and the smaller frets. ( My last guitar was a chunky C from MusiKraft with JUMBO frets, on a Strat.) I have roughed up the back side of the neck (palm side) as I have with all my electric necks for the last few years, and I definitely prefer the feel of raw wood vice a finish (nitro or poly). I want to do the same to the fret board as well. I know that some will encourage me to either sell or stash this neck and get a replacement unfinished with the same specs, but I can’t afford it. I also don’t want to fuss with a fret leveling/ dressing. I would do a straight trade locally for one, but don’t see an immediate straight trade available for something like a Road Worn neck. I do want the Fender logo… I just like it. Anyway, I’m considering using the method as depicted in the link below, using a straight razor blade to carefully scrape off the finish, and then sand gently if needed, and then finally oil the neck with something that makes it still feel like bare wood while offering protection.
I’ve done a search, and see that has been done, but I wonder how it’s holding up. I think the three main schools of thought are that 1- the neck must be sealed with some sort of finish, 2- the neck needs no finish, and 3- sealing with tru-oil or some variant will seal it and provide protection. I realize it’s a lot of work (definitely), devalues the guitar (maybe, though I think less so since it is a MIM), and that it’d be cheaper to sell this neck and buy another (probably).
My question is this: have you ever done this with either good or bad results? Please share your experience if you have.

Link: http://www.youtube.com/watch?v=CemeXExPYOk
 

dorock

TDPRI Member
Joined
Oct 22, 2012
Posts
81
Location
boulder.co
I used a small card scraper and it worked fine... essentially the same method as in the video.. I did the whole neck, front and back except for the area where the neck joins the body, and the headstock. I tung oiled it with pure tung oil--no solvents.. Works for me>>
 

Jack FFR1846

Tele-Afflicted
Joined
Sep 18, 2011
Posts
1,740
Location
Hopkinton, MA
tacomamc, I watched the video. For the fretboard, it could work. You want to be very careful and be sure that the razor is always angled to be dragging, otherwise you'll dig into the fretboard and wreck it.

I've done it a different way that will take longer but is safer. Use a file. I use the triangle file that I crown frets with. You have to clean it often and it takes a while, but you can remove the finish completely.

For the back of the neck, it's far easier. Use sandpaper. Start at about 120 and work up to 320 or so. Once both are stripped as much as you're going to do them, use tru oil. Put it on for maybe 1 minute then wipe it off. Reapply and remove the same way. Let it dry overnight. Next day, apply any good car wax and you're done. This is how I do all my necks. Music Man does something similar to this. Nobody does bare wood necks, although lots of people call this treatment bare wood.
 

tacomamc

Tele-Afflicted
Joined
Jul 2, 2009
Posts
1,973
Location
Northeast Pa
Oh man, I can't wait! I aprpeciate the feedback. I have one of the files you mention, but am unclear with how to use it. Can you expand on hat aspect? As for the back, yes, that is simple easy. I do the same thing with sandpaper, but do it with 320 the whole time. Takes longer, but helps keep me form doing too much before I realize I have gone too far. So the file, you just use it like a scraper and scrape from fret to fret? I can't imagine using it as a file and running it perpendicular to the wood grain. Am I right?
 

bender66

Poster Extraordinaire
Joined
Jan 18, 2010
Posts
9,249
Location
on my bike
Thank god for the music in that video. The mouth breathing was starting to crack me.

I was about to do this on an inexpensive neck as well. I was surprised that Citristrip didn't work on this particular maple neck, but did on another I was doing at the same time, both same brand.

The scraping looks like a chore, but if it works, so be it. I'll give it a whirl.
 

musicalmartin

Poster Extraordinaire
Joined
Aug 8, 2007
Posts
6,589
Location
Norfolk UK
I just did a neck that way .i used the ubiquitous Stanley knife blades .I just do a few frets a day until its done .I stripped the whole neck .
 

tacomamc

Tele-Afflicted
Joined
Jul 2, 2009
Posts
1,973
Location
Northeast Pa
Well, I just took the neck off and started tonight. I did two fret spaces..... Whew! That's some work alright... I have tomorrow off, so I'm hoping to finish it up then. I used the thinned, more flexible blades that go in those things you use to clean the smooth top stove, or to scrape off sit hers from your car windshield. I also have the more stout blades that go in the utility knives. I'll try those tomorrow as well and see what works best. I have 320 grit paper to finish everything up at the end. It's gonna be a project, but I think I'll be pleased in the end. I'll keep you posted with my progress.
 

Jack FFR1846

Tele-Afflicted
Joined
Sep 18, 2011
Posts
1,740
Location
Hopkinton, MA
I just file across (with the fret) and keep track of the depth to try to get to wood across the whole thing at the same time. I'll add that if you want to roll the fingerboard edges, now is the time and that same file works great for that. Do it less than you think you want. All you'd want would be to break the sharp edge.
 

tacomamc

Tele-Afflicted
Joined
Jul 2, 2009
Posts
1,973
Location
Northeast Pa
Thanks! I'll try this as well. I just gave the stiffer utility knife blade a try.... I like this better than the first one.
 

bender66

Poster Extraordinaire
Joined
Jan 18, 2010
Posts
9,249
Location
on my bike
I've rolled the fingerboard on all that I've worked on. Very comfy.

I also started with the blade on the stubborn neck. Surprisingly easy to do actually. It'll take some time, but will be worth it for that silky smooth wood.
 

tacomamc

Tele-Afflicted
Joined
Jul 2, 2009
Posts
1,973
Location
Northeast Pa
Well, I finished it up! It was a little work, but took only a little more than an hour, so it wasn't too bad. I don't have the tru-oil yet, that'll be next week's project. But I managed to get all the finish off (which was very thick) without damaging either the frets or fingerboard. Those were my main concerns. Thanks for your recommendations. The file was the perfect too to get right along the fret edge. After, I wrapped the triangle file in 320 grit paper to sand the fretboard. Here's a shot mid way through:
 

Attachments

  • image-3083310244.jpg
    image-3083310244.jpg
    49.1 KB · Views: 3,034
  • image-1254964692.jpg
    image-1254964692.jpg
    62.8 KB · Views: 2,787

tacomamc

Tele-Afflicted
Joined
Jul 2, 2009
Posts
1,973
Location
Northeast Pa
Alright, well.... I've had about an hour or two with it and I definitely like it Better this way. Now, to me it sounds different, better... Brighter, more clinky in a good way, and more clear. Same strings, and everything else. I know it's quite possible that its just a perception and there is no real change, but that's MY perception. Either way, I'm happy with it. Next week I'll have the extra cash to get some tru-oil and I'll be able to finish the job.

As a side note... When Fender made and sold guitars in the 1950's thru 1970's did they tint the fretboards, or were they spankin' white like mine is now, only with a clear coat? Just curious, as I know those old ones have darkened over time and we often tint ours now. Thanks!
 

Misterbulbous

TDPRI Member
Joined
Apr 15, 2013
Posts
20
Location
lexington, ky
Probably best that I didn't offer this advice during your process, but a different approach involves a cigarette lighter. I learned that if you hold a lighter (match, candle, etc...) at a safe distance from the poly, yet generate enough heat, the clearcoat will actually bubble up and separate from the wood in approximately 1/2" pieces. I did this several years ago on an old fender neck and I was amazed at how easy it was. The ony drawback is that if you hold the flame too close you can discolor the wood.

Well, i suppose there could be more drawbacks like lighting your guitar on fire...but it worked surprisingly well for me.
 

bender66

Poster Extraordinaire
Joined
Jan 18, 2010
Posts
9,249
Location
on my bike
Took 2 necks to work with me to use in a vise & about 10 minutes what would have taken an hour trying to hold the damn things. Ready for the tung!
 

joeford

Friend of Leo's
Joined
Apr 17, 2013
Posts
3,968
Location
st. louis, illinois
its too late now... but i would've left the fretboard alone and just sanded the back of the neck. eventually, the moisture from the exposed area will seep under the fretboard finish and make it flake off anyway. but it looks like you've got this under control. i want finished pictures!
 

tacomamc

Tele-Afflicted
Joined
Jul 2, 2009
Posts
1,973
Location
Northeast Pa
Here it is in its current unfinished state. Tru-oil comes next week. I'll post then as well. You'll see that I did the back without much concern for symmetry, but it's bare where I'll be hanging out so it meets the need/intent.
 

Attachments

  • image-2080783480.jpg
    image-2080783480.jpg
    44.7 KB · Views: 1,501
  • image-1602605937.jpg
    image-1602605937.jpg
    28 KB · Views: 1,407

tacomamc

Tele-Afflicted
Joined
Jul 2, 2009
Posts
1,973
Location
Northeast Pa
I'll put up some final pics tomorrow, maybe... I got the tru-oil today, put a heavy first coat (maybe shouldn't have gone so heavy), wiped it down and put another light coat on. Then I wiped it down real good and let it dry a couple hours. Then.... I did a third coat, this time very light and wiped off the excess. I don't have any steel wool, but tomorrow I plan to use a green scrubby pad to polish it. I like the look, which is a little darker than plain maple... Sort of dirty maple look to it. I may do more coats depending on how it looks and feels.
 

tacomamc

Tele-Afflicted
Joined
Jul 2, 2009
Posts
1,973
Location
Northeast Pa
Here it is with the three coats.....


Going to do just one more tonight and that'll be the end..... I think.
 

Attachments

  • image-3496101989.jpg
    image-3496101989.jpg
    59 KB · Views: 1,722
  • image-1811200490.jpg
    image-1811200490.jpg
    61.4 KB · Views: 1,316

tacomamc

Tele-Afflicted
Joined
Jul 2, 2009
Posts
1,973
Location
Northeast Pa
Ok, here it is finished. Feels awesome, so glad I took the plunge. Thanks for everyone's input!
 

Attachments

  • image-4183943046.jpg
    image-4183943046.jpg
    60.3 KB · Views: 1,753
  • image-3398912169.jpg
    image-3398912169.jpg
    67.5 KB · Views: 1,734
  • image-2344747565.jpg
    image-2344747565.jpg
    54 KB · Views: 1,624
Top