Neck holes too close to the edge.

  • Thread starter gee.
  • Start date
  • This site may earn a commission from merchant affiliate links like Ebay, Amazon, and others.

gee.

Tele-Meister
Joined
Sep 25, 2011
Posts
265
Location
out there somewhere.
Bought a cheapy and it arrived needing some TLC. After receiving a partial refund I'm trying to fix some minor things. The biggest one is the neck (along with the body) holes are a bit too close to the edge and have caused a slight split there.

My plan is to dowel the neck holes and the body holes with some skewers and Tite-bond and slowly re-drill them with my hand drill moved over a tad.

Is this too crazy? Unnecessary? Any pitfalls to watch out for?

ImageUploadedByTDPRI1489799975.719070.jpg
 

TRexF16

Friend of Leo's
Joined
Apr 4, 2011
Posts
4,050
Location
Tucson
No, it is not crazy.
Let's be sure we understand:
It sounds like you are in possession of both the neck and the body and the holes through the both were drilled such that the holes in the neck are too close to the edges of the neck heel. All subsequent comments are based on this assumption.
1) yes, drill out and plug with well glued-in hardwood dowels, both the body and neck holes.
2) then download and print out the T-Downs Rev E template pdf in the sticky at the top of the TDPRI Home Depot forum. Just in case this does not work for you, I am attaching it. There's no need to make a template, you can just print out the appropriate portion and use it to mark out where the neck screw holes ought to be on the body.
3) Drill through the holes from the back side of the body on your marked spots from the printout. You can use a hand drill for this and if you follow the "Style Points" below it will be entirely precise enough.
4) place your neck in the pocket and clamp it with a F-clamp, get everything lined up for the bridge (plenty of guidance on how to do this available for the searching on this site).
5) mark the spot for your neck mounting screws with a brad-point drill with everything clamped in place.
6) drill the holes in you neck to match.

STYLE POINTS: (mainly because you're using a hand drill - the above is the "easy" way with a drill press)
1) BEFORE you start any of this, measure the minor diameter of you neck screws and use that diameter of the drill bit for step 3 above. Clamp your neck in place lined up with the bridge BEFORE you do any drilling.
2) Drill the neck screw mounting holes through the body with the minor diameter bit and drill to the full depth you need for your neck mounting screws.
3) then, unclamp the neck from the body, and take the clearance drill which will be the major diameter for the screw threads on you neck screws and enlarge the holes through the body, following the holes you already drilled to the screw's minor diameter.

Everything ought to be perfect after this. ;)

Rex
 

Attachments

  • Tele_body_drawing_revE.pdf
    100.7 KB · Views: 74

John Nicholas

Friend of Leo's
Joined
Jun 26, 2014
Posts
2,856
Location
Poughkeepsie, NY
Just one other tip to add to Rex's excellent tutorial.

Make sure to mark on the drill a depth stop (a piece of masking tape on the drill bit will work) to ensure you do NOT drill through the fingerboard.

While you're at it, make sure the screws you are using are not too long... It should not be a problem in your case because it sounds like you will be reusing the existing screws.
 

MM73

Tele-Afflicted
Joined
Feb 24, 2015
Posts
1,762
Age
52
Location
South Lyon, MI
I just drilled neck attachment holes yesterday, so will add some things still fresh in my head.

Check hole alignment with the neck plate. The cheapie plate I'm using for my current build is short - the holes did not line up with T Downs print.

IMG_2397.JPG

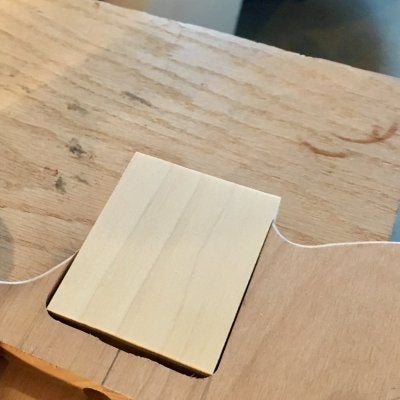
And having a block of wood tight In the pocket will save the body from tear out when the drill bit pushes thru.

IMG_2396.JPG
 
Last edited:

gee.

Tele-Meister
Joined
Sep 25, 2011
Posts
265
Location
out there somewhere.
Thanks so much for all your help (especially that handy PDF). Dowel'd the body and neck holes with bamboo skewers and Titebond on Friday. Sanded 'em down on Sat and drilled it out this morning. Got it strung up an rockin'.

ImageUploadedByTDPRI1489948803.422387.jpg
 
Top