Learning to Build An Amplifier Cabinet…Down the Wood-Working Rabbit-Hole I Go…

  • Thread starter Crowe Baaah
  • Start date
  • This site may earn a commission from merchant affiliate links like Ebay, Amazon, and others.

BigDaddy23

Tele-Holic
Joined
Jan 4, 2019
Posts
867
Age
51
Location
Australia
A tung oil finish would also be good. It will highlight the grain of the timber and is also super easy to repair with a small dab of oil on a cloth. You can still steam out dents in the finish later too (if required).
 

Crowe Baaah

Tele-Holic
Gold Supporter
Joined
Aug 11, 2024
Posts
562
Age
44
Location
PA
A tung oil finish would also be good. It will highlight the grain of the timber and is also super easy to repair with a small dab of oil on a cloth. You can still steam out dents in the finish later too (if required).

Thanks for weighing in. I watched this vid recently and at the end he reveals his go-to finish was two coats of straight tung oil, followed by two coats of tung oil mixed with a specific ratio of spar varnish/urethane. Been considering it!


Crowe Baaah

Tele-Holic
Gold Supporter
Joined
Aug 11, 2024
Posts
562
Age
44
Location
PA
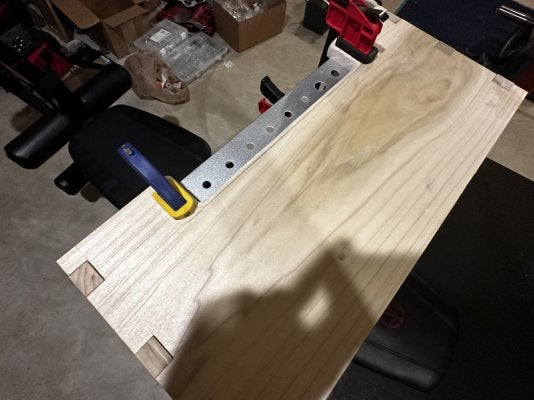
I have to admit that I didn’t think I’d be very successful on my first attempt, so I don’t have any real ‘build’ pictures to share.
Seeking to right this wrong during the next cabinet build, I took plenty of photos of the process. Let's review how to cut dovetails by hand in the Paul Sellers style (and let's be clear: my work is a crude imitation of his art. He's a truly amazing craftsman).

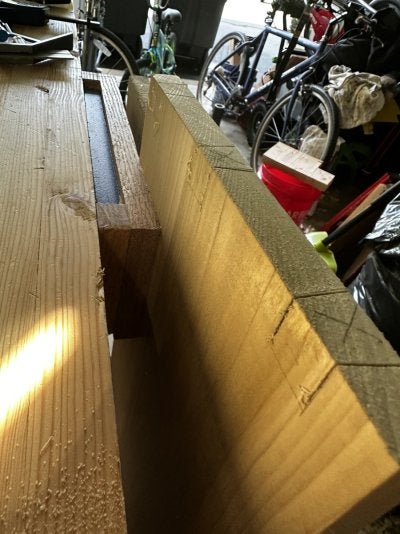
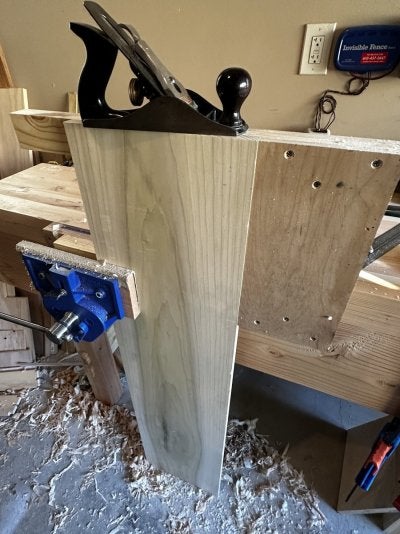
The first step is to get those boards cut to dimension and to flatten and square them up. I'm using Paul's "vise held end grain guide" instead of a shooting board here to get this poplar plank square in two dimensions. The end grain guide is built by truing up stock to the absolute best of one’s ability, and then assembling it with the same level of precision to ensure you have perfect squareness in two planes. If you do that correctly, then when you cross-cut your planks, you can saw near enough to the final dimension and plane down the last 1/16” by referencing the sole of the plane against the guide, shaving down until you are flush with your guide to square the end.

IMG_3525.jpeg

Rinse/wash/repeat until you have your boards ready for dove-tailing.

IMG_3552.jpeg


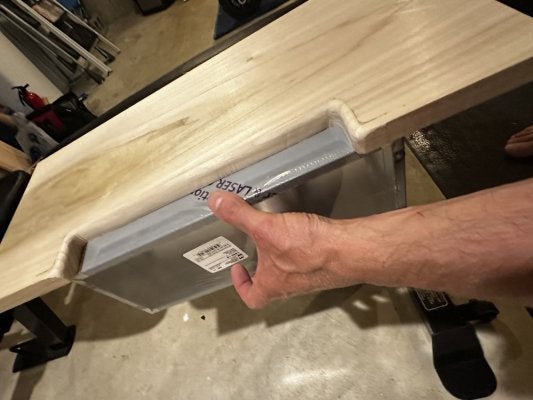
Keen-eyed readers will note that one of the boards has a cutout for the chassis. Yes, I used an electric jigsaw—I’m not a zealot! But don’t worry, I used the brace and bit to help with the corners, and a rasp and a file to get the round-over profile. I wanted to rough-out this cut first before I joined the corners rather than risk doing all the work of the joinery and blowing the cut-out on a glued-up cabinet.

IMG_3533.jpegIMG_3536.jpeg
 

Crowe Baaah

Tele-Holic
Gold Supporter
Joined
Aug 11, 2024
Posts
562
Age
44
Location
PA
The next step after prepping the boards is lay out your dovetails. For a hardwood, a 1:8 ratio is recommended to get the slope of the dovetail. The 1:8 ratio is referring to the angle that is created with 8 units of rise to one unit of run. You can set that angle with a few pencils marks on a piece of wood and a slide bevel, or you do what I did and buy a jig to help you lay out the cuts.

IMG_3554.jpeg

I opted to make the dovetails fairly large relative to the pins, in part because I felt that the fewer cuts I had to make, the less chance I would mess one up and compromise the fit. The depth of the cut is set by the depth of the board that is being joined, which I used to run a depth line across the face.

The particular jig I bought is magnetic and it grabbed the steel of my Veritas dovetail saw blade nicely to keep me square. By the end, I was able to take the training wheels off and cut squarely without the jig, and that saved me some time and made me feel less fraudulent.

IMG_3555.jpeg
 
Last edited:

Crowe Baaah

Tele-Holic
Gold Supporter
Joined
Aug 11, 2024
Posts
562
Age
44
Location
PA
With the initial cuts made, the smartest thing to do next is to sharpen the bejesus out of all your chisels. From the beginning, I decided that I would try to only use the honing guide to set the initial bevels of my planes and chisels and then sharpen by feel after that. Ultimately, I figured, if I sharpened by feel it would save me a lot of time in the long run. Unsurprisingly, I’ve copied Paul’s system and, also unsurprisingly, it works easily and quickly to produce some frighteningly sharp chisels!

IMG_3556.jpeg

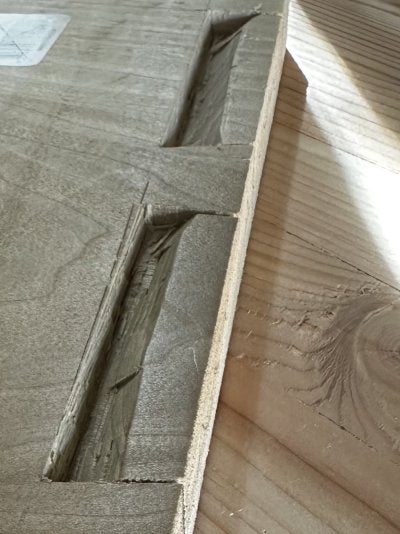
Once those are sharp—start chiseling out those tail-voids! Well, before that, grab the board that will be joined and now create a knife-wall (instead of the slightly less accurate pencil line) first. Once that wall is set up, then gingerly develop that wall: the more careful you are to ensure that the chisels don’t bruise and warp the knife wall, the more precise the final joint will be. Once you have a decent wall developed, you can get a little more aggressive chopping at the chisels until the tail voids have been liberated from the planks. Bonus points if you can keep that wall crisp and at 90 degrees to the board face to create a level tail-void to accept the future dovetail. Careful with cleaning up the surfaces just yet—better to wait to do any trimming until the test fit than to remove too much now and create a loose joint later.

IMG_3560.jpegIMG_3563.jpegIMG_3564.jpeg
 
Last edited:

Crowe Baaah

Tele-Holic
Gold Supporter
Joined
Aug 11, 2024
Posts
562
Age
44
Location
PA
After the pins have been created, the next task is to create the dovetail piece to match.IMG_3565.jpeg

Use your knife to transfer the exact dimensions of the face to the partner board, next drop square pencils lines down the face on either side, and only then…get your saw out. There is no jig to the rescue for these cuts so you have to have the confidence to do it by hand. I practiced quite a bit on scraps until I felt ready for prime time.

IMG_3566.jpeg
IMG_3567.jpeg

After you finish your cuts, you know the drill…or should I say chisel.

IMG_3570.jpeg


With your two pieces ready to fit together, hammer the hell out of them until they come together:


IMG_3571.jpeg

IMG_3573.jpeg

Oops! Actually don’t do that next time. Next time, tap them together slowly and see where they are rubbing up against each other and take out teeny tiny bits with your chisels until they come together without cracking.

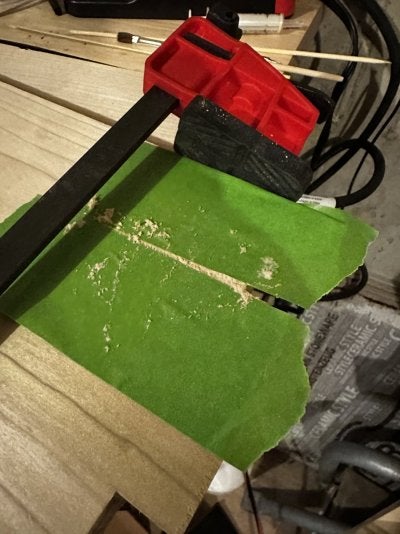
Fortunately, I had the forethought that I should start on the less conspicuous bottom corners first while I honed my skills, and this stress fracture was fortunately on the underside of the bottom piece. To fix it, I took my dovetail saw and widened the crack by sawing into it. That created enough space for me to pour in some watered down Tite-bond and sawdust mixture, problem solved.

IMG_3574.jpeg

Do all this four times and you have a dry fit cabinet ready for gluing. I’ll post some more pics on the glue-up, rounding over, and sanding another night. Thanks for following along!

IMG_3633.jpegIMG_3634.jpeg
 
Last edited:

Nogoodnamesleft

Friend of Leo's
Joined
Aug 19, 2020
Posts
3,374
Age
54
Location
Canaduh
Very nice work. I started woodworking about 30 years ago and my first bench was nowhere near as nice as yours.

I very much prefer hand tools as well. There’s something meditative about it. And Paul Sellers is good to watch. I like his down to earth and enthusiastic approach.
 

Crowe Baaah

Tele-Holic
Gold Supporter
Joined
Aug 11, 2024
Posts
562
Age
44
Location
PA
Thank you for that…YouTube is an amazing resource that wasn’t available when you started. 30 years ago I suppose it was buy a book or a VHS series (for the kids, VHS refers to archaic video tapes the size of cinder blocks that recorded ~2h max of television at a resolution which could loosely be described as at the level of “grainy Yeti photo”).
 

Powdog

Friend of Leo's
Joined
Jul 31, 2009
Posts
3,598
Age
63
Location
Cool, CA
This has been my go-to hardwood cab finish forever. It was recently discontinued so I scrambled to buy up every can I could find. It’s basically linseed oil resin, mineral spirits and varnish. Soaks in and dries so it’s not a topcoat like shellac or lacquer. You feel the wood, not the finish.

I usually determine use before deciding on a finish. If it’s gonna be gigged I’d suggest a finish that will let you repair scratches, dings and dents easily. A rubbed on oil product or wipe-on poly. If it’s gonna be sitting in a living room and not going out any type of finish is fine. Wipe on poly looks like a hand rubbed oil finish but offers better spilt drink protection than oil. I’m just partial to an oil finish so you can feel the warmth of the wood. Either way you gotta sand and sand and sand til it feels like glass, sanding between finish coats with increasingly finer sandpaper.
1752892364401.jpeg
1752892397974.jpeg
 

Crowe Baaah

Tele-Holic
Gold Supporter
Joined
Aug 11, 2024
Posts
562
Age
44
Location
PA
Either way you gotta sand and sand and sand til it feels like glass, sanding between finish coats with increasingly finer sandpaper.

Wow, that cabinet looks beautiful. Are you hand sanding between coats? Or can you use an orbital sander? And can you give a ballpark in terms of what grit you start with and what you finish with?
 

toanhunter

Tele-Meister
Joined
Jun 14, 2025
Posts
437
Location
n/a
I'd highly recommend making a shooting board @Crowe Baaah I made this one it will guarantee squareness in both planes, I made mine out of pine and am still using it 5+years later on almost every project.
 

toanhunter

Tele-Meister
Joined
Jun 14, 2025
Posts
437
Location
n/a
you might find this useful with finishing


Powdog

Friend of Leo's
Joined
Jul 31, 2009
Posts
3,598
Age
63
Location
Cool, CA
Wow, that cabinet looks beautiful. Are you hand sanding between coats? Or can you use an orbital sander? And can you give a ballpark in terms of what grit you start with and what you finish with?
I use a Bosch random orbital sander. To get a glass smooth hand rubbed oil finish it’s all about the process. I start with 120 grit to get everything even and remove any burps or farts. Then I soak a sponge with water and wipe the whole cabinet down. After drying you’ll feel a lot of grain “whiskers” that have risen as a result of getting wet. Next sand the cab with 220 grit and again repeat the wetting process. Follow with 330 grit and wet. When I no longer feel the grain raise I do a finish hand sand (with the grain) with some 400 grit paper.

Whether I use a polymerizing oil or film finish, I’ll sand between coats with 400 grit paper. A nice trick to really put a smooth finish is to use the same piece of 400 grit paper for all the sanding. It slowly wears down and acts like finer grit paper.

I’ve used this method forever. It’s time consuming and requires a lot of elbow grease, but the payoff is worth it. I completely stole it from Sam Maloof.
 

Powdog

Friend of Leo's
Joined
Jul 31, 2009
Posts
3,598
Age
63
Location
Cool, CA
you might find this useful with finishing

Rockler Woodworking Supply used to make and sell Sam Maloof oil/varnish/wax formula products in a can but discontinued them a year ago. Two different products, 8 or 10 steps. Really nice stuff, I’m down to my last can.
1752934330812.jpeg
 

toanhunter

Tele-Meister
Joined
Jun 14, 2025
Posts
437
Location
n/a
the sam maloof finish is good with darker woods especially like walnut, mahogany, osmo polyx is also excellent but expensive, I prefer making my own oil/varnish blends because I can control the mixes, poplar is a little bit on the soft side so it might ding quite badly.
 

Crowe Baaah

Tele-Holic
Gold Supporter
Joined
Aug 11, 2024
Posts
562
Age
44
Location
PA
It’s time consuming and requires a lot of elbow grease, but the payoff is worth it.
Thanks for sharing your process—the results anre impressive. Time consuming and requiring elbow grease, sign me up!

Is there curing time required between coats? Dry to touch? I mentioned I’m total noob on woodworking and finishing, so forgive me if this is dumb question: what is the last step if the process, a light coat of finish or the same light coat and a gentle 400 grit sand of that last coat?
 

Powdog

Friend of Leo's
Joined
Jul 31, 2009
Posts
3,598
Age
63
Location
Cool, CA
Drying time is different for most things but assuming 70 degrees and low humidity I let most finishes dry for at least 12 hours between steps. For oil, the last step is a wipe on/wait/wipe off with a soft clean rag and then buff, buff, buff. I use old flannel shirt scraps for the buffing. Repeat this process til you have the desired sheen. I’m usually happy around the third or fourth application.

For film finishes, you can spray or brush on the finish. For wipe on poly I actually use a China bristle brush or foam brush depending on the project. It helps to apply the finish with some kind of cross light going on so you can look across the top of the reflection and more easily see defects. Keep in mind the warmer and drier it is the faster film finishes will tack up. Nothing worse than going for one last brush stroke and dragging the tacky finish.

These are just my techniques and methods and by no means reflects those of other more experienced members on this forum. If you’re a newbie I’d suggest getting some scrap wood and practice both finish methods. Whichever way you go remember that if things go sideways you can always wait 24 hours, sand the cab down and start over. Your cab looks solid. Well done. Few people build a hand cut dovetailed cab as their first project.
 

Crowe Baaah

Tele-Holic
Gold Supporter
Joined
Aug 11, 2024
Posts
562
Age
44
Location
PA
Drying time is different for most things but assuming 70 degrees and low humidity I let most finishes dry for at least 12 hours between steps. For oil, the last step is a wipe on/wait/wipe off with a soft clean rag and then buff, buff, buff. I use old flannel shirt scraps for the buffing. Repeat this process til you have the desired sheen. I’m usually happy around the third or fourth application.

For film finishes, you can spray or brush on the finish. For wipe on poly I actually use a China bristle brush or foam brush depending on the project. It helps to apply the finish with some kind of cross light going on so you can look across the top of the reflection and more easily see defects. Keep in mind the warmer and drier it is the faster film finishes will tack up. Nothing worse than going for one last brush stroke and dragging the tacky finish.

These are just my techniques and methods and by no means reflects those of other more experienced members on this forum. If you’re a newbie I’d suggest getting some scrap wood and practice both finish methods. Whichever way you go remember that if things go sideways you can always wait 24 hours, sand the cab down and start over. Your cab looks solid. Well done. Few people build a hand cut dovetailed cab as their first project.

I don’t want to overstay my welcome here on the finishing…but I’ll venture another question: how do you finish the underside without affecting (fingerprints, etc.) one of the other faces? Can you do three sides, let them dry, and then do the fourth? Painter’s pyramids?
 

Powdog

Friend of Leo's
Joined
Jul 31, 2009
Posts
3,598
Age
63
Location
Cool, CA
I don’t want to overstay my welcome here on the finishing…but I’ll venture another question: how do you finish the underside without affecting (fingerprints, etc.) one of the other faces? Can you do three sides, let them dry, and then do the fourth? Painter’s pyramids?
In lieu of rubber feet, I attach some 1.5” screws to the bottom where the feet will eventually go. Start with the bottom and then flip the cab so it’s resting on the screw heads so you can reach the underside and address any runs. Lets air underneath while it’s drying. More critical with a film finish. With oil I start with the bottom and wipe off the excess before flipping it over.

Don’t kill yourself over the bottom. You’ll never see it. Just don’t skip it.
 
Top