First finger joint cabinet: a few questions

  • Thread starter Michael A.
  • Start date
  • This site may earn a commission from merchant affiliate links like Ebay, Amazon, and others.

Michael A.

Tele-Afflicted
Joined
Jan 12, 2013
Posts
1,410
Location
Virginia Beach, VA
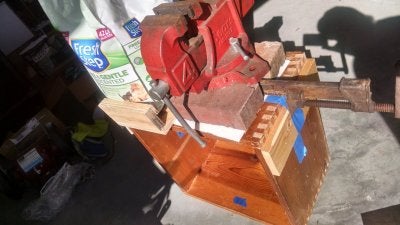
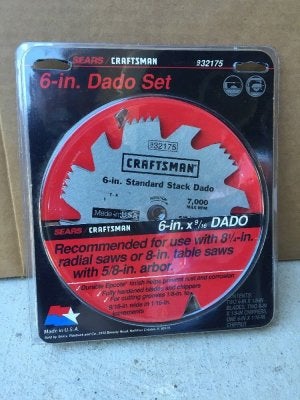
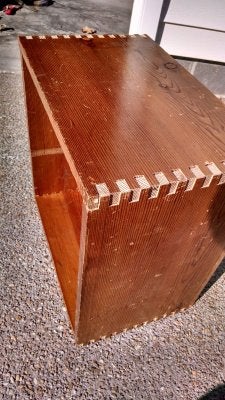
I just built my first speaker cabinet, using a $10 new set of Craftsman dado blades. The wood is recycled 11.5" pine shelves from a bookcase removed from my rental house. I have zero experience with precision woodworking, and my $100 table saw has many issues and got only terrible reviews when introduced.

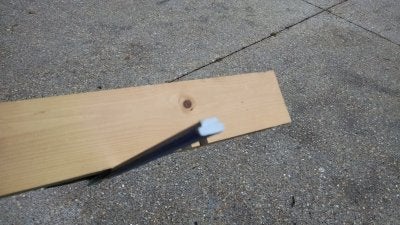
First, is there a trick to avoid having to cut some boards from inside to outside faces? I got very clean cuts when cutting the outside of the boards inward, but they were raggy when going from inside to outside, with some chip out. See pic 3. However, it was the only way I knew to allow me to get the fingers matching on each end of the board.

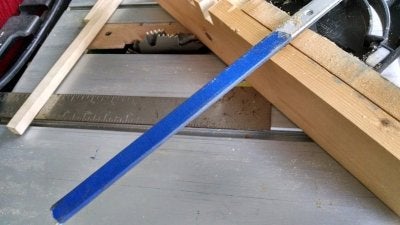
Second, I got some joints with some voids, even when clamped down as tightly as I could with the limited equipment I have access to. Can/should these gaps be filled with wood filler before sanding the joints down? I did make a sled for cutting the fingers.

Last, is it customary to round over the fingers, and is there are recommended technique when the joints are not quite perfectly flush and there are some low spots?

Don't go too hard on me for not getting everything perfect yet still going ahead and gluing it up! It does seem to be very sturdy.

I tried hard to get all of the pieces to have matching grain, and that succeeded pretty well.

The speaker will be a 1960s 15" Heppner alnico, I think from a Hammond organ. Only $15 from OfferUp.

IMG_20180316_164508064.jpg IMG_20180316_164612728_HDR.jpg IMG_20180316_143815255_HDR.jpg IMG_20180318_161448886_HDR.jpg Heppner4.jpg
 

Fiat_cc

Tele-Holic
Joined
Oct 8, 2016
Posts
513
Age
41
Location
Melbourne, Australia
I'm still learning all this wood working stuff myself.
Are you planning to cover the cab, or leave it natural? If covering I would fill all your gaps and voids with good wood putty, then sand it all smooth.
If you're wanting a natural finish, I'll have to defer to more knowledgeable wood workers. You might be able to get colour matching filler, but some of those voids snd gaps are deep, and the filler would be obvious under varnish or oil etc.
 

Michael A.

Tele-Afflicted
Joined
Jan 12, 2013
Posts
1,410
Location
Virginia Beach, VA
Thanks for the reply! I want to leave it natural, and will leave a lot of the dings and scratches, and not sand it all down and refinish. I do think I want to round over the joints.

The really loose fitting joints in pic 2 was during a dry fit. Pic 4 is how it looks glued up, and many of the gaps are much smaller, but the fingers are not perfectly flush, so I will have to take a fair amount ( maybe 1/16") off to round it over. Then I was going to use Mohawk products to touch up the exposed fresh wood, after filling and sanding, of course.
 

Fiat_cc

Tele-Holic
Joined
Oct 8, 2016
Posts
513
Age
41
Location
Melbourne, Australia
Thanks for the reply! I want to leave it natural, and will leave a lot of the dings and scratches, and not sand it all down and refinish. I do think I want to round over the joints.

The really loose fitting joints in pic 2 was during a dry fit. Pic 4 is how it looks glued up, and many of the gaps are much smaller, but the fingers are not perfectly flush, so I will have to take a fair amount ( maybe 1/16") off to round it over. Then I was going to use Mohawk products to touch up the exposed fresh wood, after filling and sanding, of course.
Yep, had a closer look at pic 4. If you sanded the proverbial out of it, you could make it flush enough to round over. Maybe even plane the sides and then sand?
 

Axis29

Poster Extraordinaire
Joined
Jan 2, 2007
Posts
7,383
Location
Beaumont, CA
The tear out can be minimized vy using a sacrificial backing board held tight against the face as the blade exits. Too late for that now. Also, you can cut them all form the same side, you just have to stagger the first joint. In the future, cut your tails a hair too long (by raising your blade) and sand back to flush.

I have been a carpenter for a long time. Finding a filler to match is a pain in the rear. Especially sun darkened wood like you have there. You can try painting it to match, or try stains mixed into the filler. But, I'd suggest testing on one of your cutoffs first.

I would also suggest that matching the finish on the corners to the existing finish might be kinda difficult as well. Again, you can use stains or dyes to get a color match. But, I would wager it would be faster to sand the whole thing down a touch and finishing it all in the same finish as the original.

Another thing you could do is cut thin slivers of matching wood the size of the gaps in the ends of your tails and glue them on. That's probably your best bet. Once the glue is set, round over your corners. Just make sure you are using cutoffs that show the end gap, or your tail ends will have the wrong grain...
 

JuneauMike

Poster Extraordinaire
Joined
May 5, 2015
Posts
7,784
Location
Alaska
A 1/2 inch roundover router bit works great for Fender style cabinet. Although the top and bottom horizontal face edges are 3/8, I believe. But you could do 1/2 for the whole thing and likely no one would tell the difference.

What Axis29 says about tear out is spot on. A sacrificial piece will give you nice clean cuts.

The trick to finger joints is to mechanize the process to the greatest degree you can. Remove yourself from the process as best you can, you need repeatable outcomes here. One way to do that is to build a table saw sled. You can find ideas on the web. I built a sled for my router table but the principle is the same for a table saw.

sled.gif

I've got a 1/2 inch piece of oak as a key set and the sled runners are also oak. They run along the guide channels and give perfectly spaced fingers. It took the better part of an afternoon to build this and get it functioning properly. When you are ready to go, you should have several test corners for the scrap heap before you start on the finished cabinet. Set up is time consuming and wasteful for this kind of woodworking but its essential for good results.

Also, TDPRI Toolshed may have some more to say about woodworking. Good luck.
 
Last edited:

cap47

Tele-Holic
Joined
Jul 27, 2014
Posts
604
Location
bushnell, fl
Tear out can be minimized by scribing the fibers at the back side of cut depth and also helps the front. Layout the fingers to know where to scribe.
 

Michael A.

Tele-Afflicted
Joined
Jan 12, 2013
Posts
1,410
Location
Virginia Beach, VA
Thanks to all of you for the suggestions. I'll know next time to use a backing board, and will remake my sled with a 3/4" plywood face so it is flatter than my current one, for better clamping. I had set the blade to make the cuts deeper than the board, but the blade has no lock on my cheapo saw and I think maybe it drifted down from my original setting due to vibration. I'm probably going to leave my gaps as is, the piece will be a reminder that I have a lot more to learn. I may even abandon trying to round over.

I did find that I had some movement in my sled. My Hitachi saw has 9/16" slots for the miter gauge and sled, and I didn't have any stock of that width handy for the sled, so I just used something narrower and biased the 2 runners towards each other. Now I can see how important it is to improve that and take out the 1/16" or so movement that I could detect. Maybe also buy a pair of quick release clamps so I can move the work piece more quickly to speed up the process. Pics of my sled below.

The scribing technique sounds very useful and I'll implement that next time too. Does it also help to tape the side of the work piece on the tear-out side?

Thanks very much!

IMG_20180303_175949470.jpg IMG_20180303_180119936.jpg
 

JuneauMike

Poster Extraordinaire
Joined
May 5, 2015
Posts
7,784
Location
Alaska
I'm sure scribing the lines would help with blowout, but that seems like a lot of tedious work to me. But then again, I'm lazy. I have used tape before. Maybe it helped minimize tearout a bit, maybe, but not nearly as well as a thin piece of press board.

I like your sled but it's important to get any backlash or movement out of the equation. I'd consider removing those risers from the bottom and putting them on the top and then screwing another horizontal piece of wood to them. Then you can dado through the whole width of the jig if you want and it will hold together fine. Just let flat surface of the jig ride on the channel guides by themselves. Might also screw in a larger face plate too to make clamping and holding the work piece easier. I think you've got a perfectly useable jig there.

Then take a bunch of scrap wood that is the same thickness as your cabinet and start making test cuts. Like I said, its time consuming.

Great deal on the dado blades, btw. I've thought about buying some for myself but for some reason all that metal flying around just scares me more than even running a router. But if I found a set for $10 ....
 

JuneauMike

Poster Extraordinaire
Joined
May 5, 2015
Posts
7,784
Location
Alaska
As I examine your runners, I see some things I'd change. It appears that they are running on the bottom of the guide channel. My runners actually floated with about 1/6th clearance from the bottom. They were flush with the side walls of the guide channel though, that's important.

I recall spending a lot of time cutting and plaining the runners to depth (edit: make that "width"). Tedious work, but it helped a lot. Then I used spacers (washers) to lift them off the bottom and glued them in place. Then came back and drilled and screwed them in flush mount.

I lubricated them with some ski wax, but you could use whatever you've got. You just don't want to introduce water into the mix because wood swells, as you know.
 
Last edited:

Michael A.

Tele-Afflicted
Joined
Jan 12, 2013
Posts
1,410
Location
Virginia Beach, VA
Thanks, JM! I will take the comments to heart. I'm sure you are right about improving the sled's runners, and I'll do that this week so I can try another cabinet next weekend. It makes sense the runners need to be off the bottom, so they don't drag in the dust, and as tight fitting as possible to prevent lateral movement.

My saw's miter gauge has a weird size and profile, and was itself such a loose fit, I had to wrap it in painter's tape. Sometimes with cheap equipment, everything works against you. I don't think I can even get good right angle cuts. I wonder if I could make a couple of Delrin runners on my router table that fit the saw deck grooves correctly.

Thanks again!

IMG_20180226_085710664_HDR.jpg IMG_20180226_085638757.jpg
 

JuneauMike

Poster Extraordinaire
Joined
May 5, 2015
Posts
7,784
Location
Alaska
I use a crappy Craftsman saw myself and yeah, sometimes getting a good cut out if it is a blood-soaked donnybrook. Luckily, my free time is not money. And my miter gauge was exactly like yours. Probably 1/8th inch of slop in it, I'd swear that it was meant for a different saw.

You could probably make the runners on the router but I get a little nervous whenever I'm using a router for small work like that, things can go bad very quickly.

I recall just setting the fence on my saw for the approximate depth I needed and then cut like maybe 2' pieces to depth like slicing bread. Then reset the fence to cut the width with a bit of overage. Then I shaved it down using handtools and sandpaper. It seemed much safer. I cut a bunch of strips and then just used the lengths that were the closest.

Another thing that's handy in the garage is a small sheet of glass. (I've got some glass that I intend to use for a shooting board someday) You can stick some sandpaper to that and then just run the pieces back and forth, gives a nice flat edge.

Remember, the runner strips don't need to be perfect, they just need to be close enough that they can freely slide in the runner space with no side to side slop. I'd recommend making quite a bit of runner material (maybe 3-4 feet), then you could use it for future sleds and jigs.
 
Last edited:

Axis29

Poster Extraordinaire
Joined
Jan 2, 2007
Posts
7,383
Location
Beaumont, CA
I'm always cutting runnners for the slots in my table saw. I'm always making stuff on the jobsite, or wearing out jigs I use all the time. I make jigs like this to use with my router table as well.

Cutting a runner on your table saw, for the same table saw (or a router table), should be easy. Just measure the width of the slot, and make a corresponding cut in some scrap material. Better to cut it a hair fat and trim it or sand it to perfection.

Then, use a countersink bit to drill clean holes in the runner stock to attach it to the bottom of your jig. This keep;s the runners fomr bulgign where you drive your screws in.

I've bought UHMW plastic and those runnners last forever and get moved from jig to jig.
 

cap47

Tele-Holic
Joined
Jul 27, 2014
Posts
604
Location
bushnell, fl
With a 6" Dado set you will have to be mindful of the base thickness of your finger joint jig. I have a 6" dado set and had to change the base thickness to make a full depth cut. I had a piece of 1/4" plexi that worked well for my base. 8" dado would work with a thicker base. It is cheaper to change the base than buy 8" dado. I had a cheap Craftsman table saw when I was doing my finger joints. It was recommended not to use a larger than 6" dado cutter.
(image removed)
(image removed)
 

cap47

Tele-Holic
Joined
Jul 27, 2014
Posts
604
Location
bushnell, fl
I like how you use the furring strip C-clamped to the table to set your depth of cut. And the wing nuts allow some lateral adjustment if necessary.

Nice jig.
I used scraps from other work and there was no plan to have the half circle cut at each end where the wing nuts are, it was there on the scrap.
 
Top