You are using an out of date browser. It may not display this or other websites correctly.
You should upgrade or use an alternative browser.
You should upgrade or use an alternative browser.
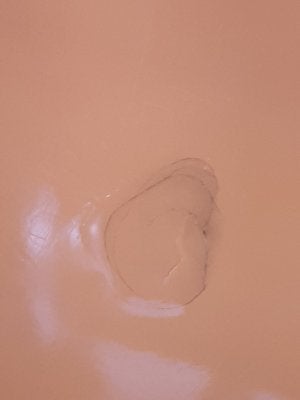
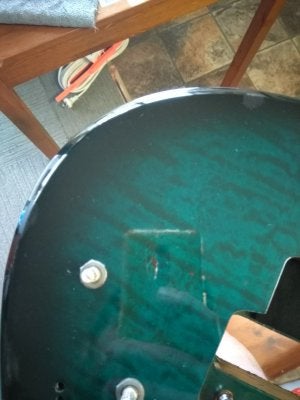
Dent fix on veneered guitar body
Nothing will make it disappear. My recommendation would be to:
A unicorn sticker would go good there...
This was a "quick" CA fill/sand/polish on thick poly.


- Clean dent with naphtha well
- Drop-fill a thin layer of CA to wick through the cracks
- Drop-fill with additional layers of medium CA, epoxy, Gluboost, or Solarez. All work well.
- Build fill to flush or just under surface of top.
A unicorn sticker would go good there...
This was a "quick" CA fill/sand/polish on thick poly.


Last edited:
wabashslim
Friend of Leo's
A much bigger knob on that pot?
Davecam48
Poster Extraordinaire
Nah!!!!! Just put a band-aid over it and start a new trend! 
DC
DC
I have fixed deeper than that before.
FILLING:
-If wood is showing, dye it to match the body color. Even a permanent marker can work if near the right color. (It will darken after filling the dent)
-You can even mark the stripe one color after putting on the color like the green/blue in your instance.
-Fill with epoxy. Use Wax Paper and lay over the filled dent. Then weight down a flat object to hold the wax paper flush while it hardens.
-Try to get just enough epoxy in to not over or under fill. Epoxy does shrink a bit while hardening.
-Let it harden a day or so.
-Remove the wax paper and check it out. You are likely going to have to fill one more time due to any bubbles or low spots.
FINISHING:
-Once flush, sand it staying only a little outside the filled area as best you can.
-Wet sand with progressively finer paper like 400-600-1000
-Brush some finish over the repair thin.
Now the secret:
- you will never get it shiny with hand wet sanding. Use some '3M Finesse It' polish and a Foam Wheel like this and it will shine and match in seconds!

All of this takes some time, but works perfect.
FILLING:
-If wood is showing, dye it to match the body color. Even a permanent marker can work if near the right color. (It will darken after filling the dent)
-You can even mark the stripe one color after putting on the color like the green/blue in your instance.
-Fill with epoxy. Use Wax Paper and lay over the filled dent. Then weight down a flat object to hold the wax paper flush while it hardens.
-Try to get just enough epoxy in to not over or under fill. Epoxy does shrink a bit while hardening.
-Let it harden a day or so.
-Remove the wax paper and check it out. You are likely going to have to fill one more time due to any bubbles or low spots.
FINISHING:
-Once flush, sand it staying only a little outside the filled area as best you can.
-Wet sand with progressively finer paper like 400-600-1000
-Brush some finish over the repair thin.
Now the secret:
- you will never get it shiny with hand wet sanding. Use some '3M Finesse It' polish and a Foam Wheel like this and it will shine and match in seconds!

All of this takes some time, but works perfect.
stratisfied
Friend of Leo's
Before you do anything, verify if the veneer is wood or photoflame. I am guessing it is a photoflame veneer based on the white edge showing around the pickup routes. Photoflame is printed on a white base material that lacquer will melt away. If this is the case, you should avoid getting lacquer on the base material.
Here is the technique for touchup and drop filling:
Here is the technique for touchup and drop filling:
Last edited:
euphi
TDPRI Member
Thanks for the tips mate. Looks like I'll be busy today.I have fixed deeper than that before.
FILLING:
-If wood is showing, dye it to match the body color. Even a permanent marker can work if near the right color. (It will darken after filling the dent)
-You can even mark the stripe one color after putting on the color like the green/blue in your instance.
-Fill with epoxy. Use Wax Paper and lay over the filled dent. Then weight down a flat object to hold the wax paper flush while it hardens.
-Try to get just enough epoxy in to not over or under fill. Epoxy does shrink a bit while hardening.
-Let it harden a day or so.
-Remove the wax paper and check it out. You are likely going to have to fill one more time due to any bubbles or low spots.
FINISHING:
-Once flush, sand it staying only a little outside the filled area as best you can.
-Wet sand with progressively finer paper like 400-600-1000
-Brush some finish over the repair thin.
Now the secret:
- you will never get it shiny with hand wet sanding. Use some '3M Finesse It' polish and a Foam Wheel like this and it will shine and match in seconds!
All of this takes some time, but works perfect.
euphi
TDPRI Member
stratisfied: thanks for the info. I had no idea what any of that was before you warned me. U just assumed it was a thin veneer.
And thanks to everyone else who contributed. I've generally learned by hands-on trial & error, its not practical when dealing with guitars.
I'll do my best to post pictures of the end result, I'm up to my ears in repair jobs...3 or 4 at last count.
Included a pic of my 2 ESP (LTD) WiP's. Black guitars are heaps easier than flamed finishes.
Merry Xmas

wabashslim
Friend of Leo's
A much bigger knob on that pot?
stratisfied
Friend of Leo's
Yeah, verify whether or not it's photoflame. Easiest way to tell is the edge of the veneer shows a white backing sheet at the pickup routes. Clean any polish off first with mineral spirits nd verify even if you have to lightly sand the edge. The photo emulsion is highly reactive with lacquer thinner, so Glue Boost (CA Glue) tinted the appropriate should would be your best method.
If it is wood, you then need to determine if the finish is lacquer or polyurethane/polyester. Test a concealed area with swipe of lacquer thinner on a Qtip.
If lacquer, you can mix thinned translucent lacquer to color the chip and surrounding cracks, and then follow with a clear lacquer drop fill like the video. If the finish is poly, you can drop fill with tinted Glue boost or shallow fill with tinted lacquer for color followed by a clear CA (any brand is fine) drop fill. Follow the scrape/sand/polish procedure in the video.


