Advice on sanding fretboard radius with sanding block

  • Thread starter Verzila
  • Start date
  • This site may earn a commission from merchant affiliate links like Ebay, Amazon, and others.

Verzila

Tele-Meister
Joined
Dec 21, 2012
Posts
213
Location
WR15 8PH, United Kingdom
I need to put a radius on my flat (unfretted) fretboard. I'm limited in space and availability of tools so I'm looking at radius sanding blocks.

I understand that there are any number of pitfalls in this (twisting the block as I'm sanding, going too far off to one side), so my first idea would be to knock up a jig of a pair of parallel guides on either side of the neck, as a starting point, but I will be grateful if anyone has any advice for getting best results
 

Peegoo

Telefied
Ad Free Member
Joined
Oct 11, 2019
Posts
31,576
Location
Beast of Bourbon
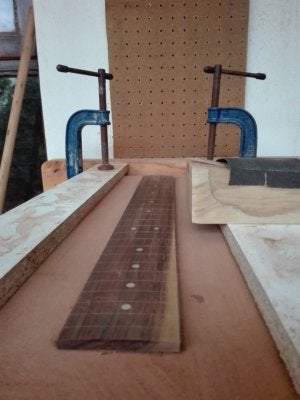
If you're getting a radiused block, make a little jig from scrap wood to mount the fretboard blank in (use double-stik tape) and serve as a glide for the block. The block slides in the channel atop the fretboard. Keep a Shop Vac handy to brush out the sanding dust from the work and the sandpaper to keep it cutting.

Like this:

Radius-sanding-jig.jpg
 

Jupiter

Telefied
Ad Free Member
Joined
Jun 22, 2010
Posts
30,286
Location
Osaka, Japan
concentrate a LOT on getting even pressure and keeping the block straight and square in the jig! It's a lot more work getting fret ends to seat fully if you round off the edges more than the rest of the FB... :oops:

I'm not saying that ever happened to me; I'm just saying I buy pre-radiused boards nowadays.
 

pypa

Tele-Afflicted
Joined
Jul 21, 2020
Posts
1,579
Age
55
Location
new jersey
definitely invest in a long radius block. The Philadelphia Luthier ones are excellent and about 1/2 price of others. You can / should also buy some 80 grit sandpaper to adhere to it. Philadelphia Luthier Supply has Indasa Rhynogrip psa sandpaper rolls the perfect width. This is about the best sandpaper on the market IMHO.

You said unfretted, but I assume the board's slotted. Definitely slot before radiusing. It's easier to mark the slots when flat, and the slots fill with dust as you sand the radius, so you can see how square you are, and make sure you're not tapering. When the very top of all the frets fill with dust, you will know your radius is perfect.

You can use a block plane to assist your speed and save a little sandpaper, but only resort to that if you are not achieving acceptable speed. Even just with sandpaper on an ebony board, it's not a very long process.

If this is a one-time thing, your best bet might be just to buy a pre-radiused fret board. Luthier Mercantile has these shockingly economical.
 

oldunc

Poster Extraordinaire
Joined
Jan 31, 2014
Posts
6,061
Age
75
Location
California
I like both Pegoo and Bullfrogblues' suggestions. My method has been to radius while the piece is square; I make my own sanding blocks on the bandsaw; I make them the exact width of the fretboard blank and put a masonite fence on one side- I find that enough of a guide.

ps- the sanding block with fence, if carefully made, also makes a good square reference for cutting fret slots.
 
Last edited:

wadeeinkauf

Tele-Afflicted
Joined
Sep 24, 2010
Posts
1,362
Location
Monterey CA
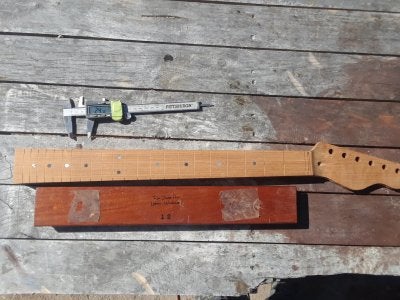
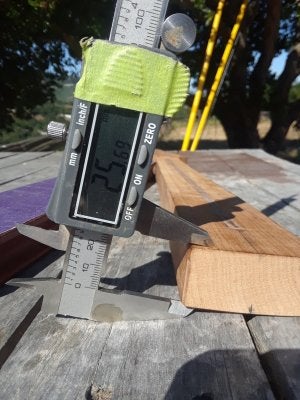
The very best advice is to buy a slotted radiused fretboard. Stewmac has a rosewood 12 degree for $32. Of all the skills needed to make a good playing guitar this may be the most important to get it right. You need good tools to cut the slots and they get expensive fast. Having said all that, there are times you must do it yourself. One piece necks, non standard sizes, cut for a zero fret. My wooden 12 degree 17 long one from ebay works great. I glue in 150 grit sand paper and sand the radius. Put in 220 to smooth and them by hand 400. Get a Digital Caliper from Harbor Freight (you can order it) for $10. Measure both sides of the neck, sand to even. I cut the fretboard or rout the neck to proper size and then sand. You must be able to measure the sides to cut an even radius. This is not a problem.


7.jpg 27.jpg 3.jpg 24.jpg 1.jpg
 
Last edited:

schmee

Telefied
Ad Free Member
Joined
Jun 2, 2003
Posts
31,222
Location
northwest
Use your overhanging fingers as a guide will do it I think. A touch off occasionally likely wont be an issue. In some ways that's what a compound radius board is!
 

pshupe

Tele-Meister
Joined
Aug 18, 2012
Posts
273
Location
Hamilton
jigs are your friends. I use a jig to hold the fret board in the center and use the edges as a guide for my 18" aluminum sanding beam. I tape a jointer push stick to the top and have many strips of sandpaper to go from 60 grit to 400 with the beam. I mark the board each time with yellow pencil and count my strokes each way. It does not take long and leaves a perfect radius and very smooth.

bKCti3O.jpg


Regards Peter.
 

Freeman Keller

Doctor of Teleocity
Ad Free Member
Joined
Aug 22, 2018
Posts
15,880
Age
80
Location
Washington
I might try to sand a very mild radius - 20 or 16 inch into a flat board but I learned a long time ago that it is cheap and easy to have LMII do if for me. I use boards from 12 inch to flat and all kinds of different scales - it has never made sense for me to jig up to do them in my little shop.
 

Slowtwitch

Tele-Holic
Joined
Dec 30, 2018
Posts
660
Location
South Africa
1. You can make your own sanding beams. And it doesn't need to be long

2. Switch sides from where you stand - this helps eliminate uneven pressure either left or right

3. Use a vernier calipers up and down each side to make sure left and right and 1st to last fret is all same level when you start getting to the full profile of the radius
IMG_20190414_175015.jpeg
 

guitarbuilder

Telefied
Ad Free Member
Joined
Mar 30, 2003
Posts
26,731
Location
Ontario County
The shorter the radius beam...the more hills and dales you will sand into it. Think of surfacing wood with a plane. It's the same idea.


The first reason is the usual reason we are all taught that when milling wood by hand (which I do) the longer the plane you use the more accurate the final result will be. The standard way of planing anything flat is to first intentionally plane it hollow and then with the longest plane you own go from end to end until the high ends disappear into one long continuous shaving. If you use a short plane the concavity under a shorter plane will be less and therefore you will get that continuous shaving over a shorter distance than a longer plane and it is less accurate. It's beyond the scope of this blog entry to go into all the geometry but that's why in the days when people did all their milling by hand a long plane was pretty useful. This is especially true because in the 18th century, when wood was sawn by hand it was sawn pretty accurately and to final thickness and by the time it got to the joiner ideally only a few passes with a jointer plane were needed to finish the job. Smooth planes were used to take care of low spots the jointer missed.


Long Planes in the Modern Workshop (toolsforworkingwood.com)
 

oldunc

Poster Extraordinaire
Joined
Jan 31, 2014
Posts
6,061
Age
75
Location
California
True enough about the planes- not to mention jointer planes for edges. But the situation is somewhat different since in a long plane you're only actually cutting at one point. With a sanding block you're removing material all along its length; my concern with a long block would be that pressure would be uneven, possibly resulting in it cutting faster in the middle of the workpiece than at the ends. I can't see much danger of sanding in irregularities with a short block. Wood for fingerboards is of necessity quite uniform and dense- if you keep your stroke even, and are very careful with your turnarounds, you should get uniform results with a shorter block.
 

Peegoo

Telefied
Ad Free Member
Joined
Oct 11, 2019
Posts
31,576
Location
Beast of Bourbon
My concern with a long block would be that pressure would be uneven, possibly resulting in it cutting faster in the middle of the workpiece than at the ends.

You avoid this by using full strokes and applying very little pressure; allow the sandpaper to do the work.

The longer a block is, the more even (flat) the sanding results will be down the length of the board.

Start with 60 grit to establish the radius; next, lightly scribble the surface of the wood with the side of a pencil, and then switch to 120 grit and remove the pencil lines. Do the pencil thing and then hit it with 220 grit.

Let the weight of the block do the work. Don't lean into it.
 

guitarbuilder

Telefied
Ad Free Member
Joined
Mar 30, 2003
Posts
26,731
Location
Ontario County
True enough about the planes- not to mention jointer planes for edges. But the situation is somewhat different since in a long plane you're only actually cutting at one point. With a sanding block you're removing material all along its length; my concern with a long block would be that pressure would be uneven, possibly resulting in it cutting faster in the middle of the workpiece than at the ends. I can't see much danger of sanding in irregularities with a short block. Wood for fingerboards is of necessity quite uniform and dense- if you keep your stroke even, and are very careful with your turnarounds, you should get uniform results with a shorter block.


As I consistently say, the longer aluminum beam is the way to go. If wood moves, than the accuracy of a wooden block can change. It does on neck wood....right? By the way, my first radius block was a bunch of glued up outer scraps from a round tabletop. That indeed worked. Then radius blocks became a thing years later...then the aluminum ones. Now extruded aluminum is not the be all end all. There's variation in extruded shapes....but I'm not going back to wooden blocks except for clamping or holding a neck. Ideally if I had a milling machine I'd mill a solid piece of some heavy metal for the task at hand.
 
Last edited:
Top